
How to cut pictures use paint brush
Paintbrush is a simple paint program for Mac OS X, reminiscent of Microsoft Paint and Apple’s own now-defunct MacPaint. It provides users with a means to make simple images quickly, something that has been noticeably absent from the Mac for years.
When Apple released the original Macintosh in 1984, they included two applications: MacWrite and MacPaint. Twenty-five years later, every Mac still includes a basic text editor in TextEdit, but a simple paint program is a thing of the past.
Enter Paintbrush.
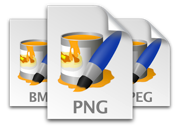
Paintbrush can open and save to most major image formats, including BMP, PNG, JPEG, TIFF, and GIF. Full support for transparency is available for image formats that support an alpha channel (currently PNGs and GIFs). You can also paste images copied from many common Mac applications, including Microsoft Office and Apple Work.
I will give you some tutorials, how to use paint brush application
1. Locate the image you want to cut and right-click the image file. After that, a drop-down menu will be displayed on the screen.

2. Hover your cursor over the Open with option. This option is in the middle row of the drop-down menu

3. Click Paint. This option is next to the blue paint palette icon.

4. Click the "▼" button under Select. The "Select" option is under the "Image" segment in the "Home" tab, at the top of the "Paint" window.

5. Click Rectangular selection. This option is the first choice in the drop-down menu.

6. Click and drag the cursor on the image. With this process, the rectangular frame formed from the points will be dragged and widened in the image. Whatever area is inside the outline is the area that will be saved the next time you crop the image.

a. If you want to erase the outline of a photo, the best way to do this is to click the top left corner of the photo and drag the frame diagonally to the bottom right corner of the image (or something like that).
b. To delete a frame and start over, click on any area that is outside the area that is inside the frame line.
7. Click Crop. This button is located at the top of the "Image" selection segment, next to the "Select" option. After clicking, the image area outside the frame line will be deleted so that only areas within the frame are saved.

Tips
After opening the drop-down menu under the "Select" option, you can also click the "Free-form selection" option to draw a selection area freely (eg any shape other than a rectangle).
Warning
When the image is selected, be careful not to press the Delete key. If you accidentally delete an image / image area that you want to save, click the backward arrow at the top of the page to undelete it.
No comments:
Post a Comment